


Operation steps:
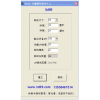
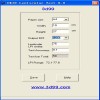
1.Set size of paper, the width should be same as the size of picture that you want to make.
2.Set DPI that you want to output. You can set DPI of the injekt printer or DPI of UV offset printer.
3.Set estimated value of lenticular LPI, means that the number of lines in each inch lenticular.(the figure is estimated by yourself, the software can create one test chart by putting this LPI and adjacent LPI together automatically.)
4.Set test accuracy, means the difference value of LPI in adjacent test strips.You can set 0.1,0.01 or 0.001.
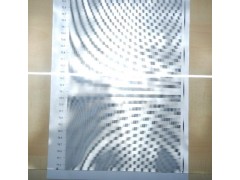
5.Press ‘Creat’ button to creat test chart.
6.Press ‘Save’ button to save test chart, for other software invoke injekt printing or UV offset printing.
7.Quit the software.
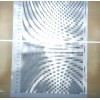
8.Add lenticular to the test chart which was printed out by injekt printing or offset printing.
Align lenticular, rotate the direction of lenticular, make sure the lines that you have seen is vertical to your eyes.
Choose proper viewing distance to watch the image, the viewing distance is the same as that when you watch your future work.
9.Shaking side to side, find out the entire line area in every test strip where changing into black or whit at the same time. If it disappears slowly from left to right or from right to left, then it is not, the figure in the line where changing into black entirely at the same is that you want.
10.If can't find the proper test strip, you can regard the most close LPI as the estimated LPI.
Reduce the test accuracy, test again. Until you find a suitable figure.
